
PICTURE HEAVY POST.
You won't believe how excited I am to share this today. This project started for my Mom's 50th birthday (which was in October last year!) and then was finally completed pretty late - a lot of client projects, give-away projects, my laziness and a move from one end of the city to another got in the way. Because this was a personal project, it also got neglected and because my mother didn't know I was making this, she wasn't bothered about the delay.
Anyway, this was my first proper experiment with Micro-Quilling and all other projects that I've shared
were a result of the things I learnt from making mistakes in this one.
I would have loved to show you day-wise updates but then it would be... wait, how many days is seven months... 7 x 30, but some months have 31 days, so.... a lot of days I am guessing. So I am showing you pictures in Phases. Let me elaborate. :)
PHASE 1
October 26 - 31, 2013
The outline on the base CS.

I made this in Picasa as I had been doing for all my projects till then. I found that to be the easiest software while dealing with fonts, especially if I wanted a couple of characters to overlap here and there.
The easiest thing to do would have been to get this printed outside in whatever size I wanted, but that would have meant using their paper and the paper these printing shops use, curves easily with the glue because it is so thin and I was sure there was going to be a lot of glue on it.
So I decided to print it at home on regular card stock which would be a reasonable thickness. :)
But there was still one hitch. The maximum width I could print on was about 8.5" (home printer) and I wanted at least a 12" x 12" base. So I printed the outline on A4 size tracing paper, traced the design on the reverse with a dark thin pencil - 2B lead and use and embosser to transfer the image (and also get some dents on the paper that I thought would make the outlining in 3mm paper strips easier.)
You can see the tools used in the above image.

As you can see, the outline wasn't transferred perfectly but it gave me enough to work with. Even though I thought that an embossed outline would keep the paper strips in line, it actually slightly changed the shape of the paper, so I haven't done that for any project after that.
Once that was done, I erased the pencil marks and started work.

PHASE 2
November 1 - 6, 2013
Beginning Work
As this was my first time doing cursive lettering, I made a lot of mistakes. The fact that this is a personal project was the only saving grace because this was my learning, this is how I would get better.
For instance, see the curve in the 'H' of 'Happy', you'll see that there's a slight dent. It wasn't supposed to be there and it isn't there in any other projects Moumita or I have made since. :)
I decided to do just the outline for 'Happy', 'Birthday' and the 'th' over 50 and fill '5' & '0' with Micro-Quilling. When I was contemplating patterns, I thought I'd do kind of a mehendi (henna) pattern and see how it looks. So I picked the colour scheme and started with the top left corner of the '5'.
.JPG)
Also, I didn't complete 'Happy' fully before starting work on the '5'. I only did that portion that was below the 5.


PHASE 3
November 7 - 24, 2013
Some progress. Only some.
A day or two later, I was done with 'Happy' and quite a bit of '5'.


At this stage, I didn't have a pattern decided, so I did what I thought fit in a particular area, just went with the flow.

'P's and 'Y' - much better than the 'H' and 'A'.

PHASE 4
November 25 - 26, 2013
Getting some useful tips
This is not a stage as such but I took these pictures to send to an amazing Quilling Artist who has been a source of amazing inspiration with her work in Paper-Type or Quillography - Sabeena Karnik.
I wanted to know if she had any tips that would help me avoid the curling of paper due to the liquid nature of the glue and what precautions I needed to take to ensure that the dust DID NOT settle in between the paper strips. The second part was more crucial because based on my speed, this was going to take a while and I did not want this to end up dirty.
She was very helpful and I got a response almost instantly!!!! <3


PHASE 5
November 27 - December 3, 2013
Half Done...
At this stage, I was half done... meaning, one of the two 'outline words' was done. One of the two large digits was done. At this rate I should have finished by January 8, 2014. I am going to wait till the end to tell you when I Moumita and I really finished this.


PHASE 6
December 4 , 2014
Adding Borders...
After looking at the project half done, I realised that the edges were too empty. Because the design was created on an A4 sheet and then transferred, there was nothing on the sides. So I decided to make something.
At this stage, I got Moumita involved. I figured, I knew slightly more about Micro-Quilling than I did a month ago so it was time to teach her what I had learnt. Before her involvement in this project, she practised some outlining and micro-quilling on her own personal project - her Monogram - which was just curved strips of paper. So she did the double coloured petals (orange & off white) and I did the solid coils and leaves and stuck them as a border.


PHASE 7
December 8, 2013 - Sometime in April 2014.
Final Touches.
In December, we became busy with experimenting with Beehive Quilling because our FB page reached 1,000 fans and we HAD to do a give-away. Then I moved from the suburbs to Navi Mumbai and it was a while before I remembered I had to complete this.
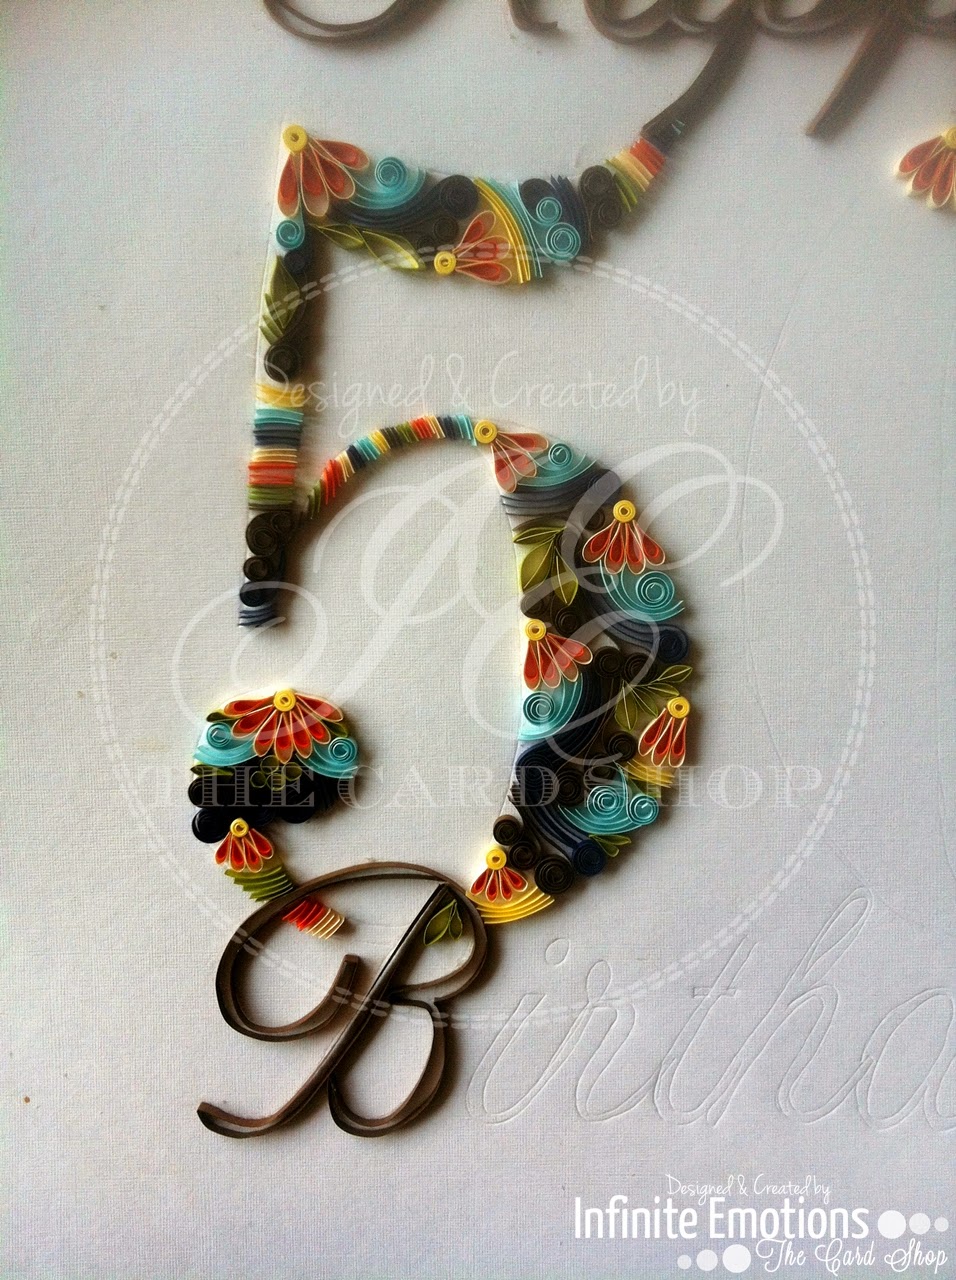
So I started with the '0' and by this time, I had a clear pattern I was working with and I followed that.
Here are a few close-ups of the designs inside '0'.


After a while, when there was other stuff to do, deadline oriented stuff, I asked Moumita to learn the henna-like patterns and she did the last bit of the '0', the rest of 'Birthday', the 'th' and as I had already promised her earlier - the border on the other side. I realised that just the floral border wasn't enough, so I added some brown scrolls on my side of the border and Moumita did the same. The logic behind this was the same - this was a learning project for both of us and we were both allowed to make mistakes in this one and not be judged. But we were quite happy with the outcome and finally, after months of delays and procrastination, this was finished.
Here's what the finished project looks like.
I still haven't given it for framing. Maybe I should do that today :P
1.JPG)
2.JPG)
.JPG)
.JPG)
1.JPG)
2.JPG)
.JPG)
.JPG)
Phew!! That was one long post. But I'll be back soon with another page from the scrapbook!!!
Just 2 more to go! Yayyy!!
Till then,
Happy Crafting!
Love,
Nikita... :)
Nikkita...ths is FAB!!...loved the little details u have put in...lovely piece..
ReplyDeletethis is super
ReplyDeleteThank you!
DeleteAmazing.Please conduct a class.I want to. try my hand at this.have been watching a lot of tutorials.But this one was fabulous
ReplyDeleteAwww.. Thank you Snehal!!! <3 Will send you a message on Facebook :)
DeleteIncredible!
ReplyDelete