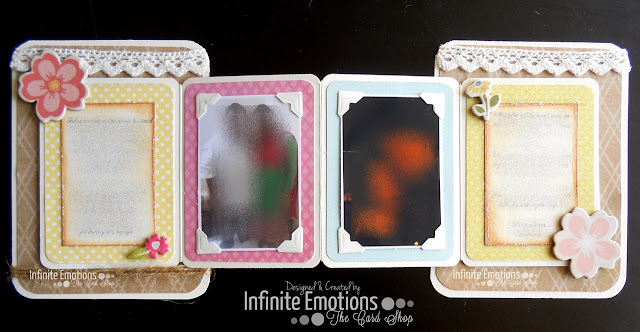
It all started when I received a call from someone who wanted to gift something special to her fiance on their engagement that was about to take place in a few days. I asked her if she already had something in her mind that she wanted me to do on the card. When she said no, I asked her if she liked something that I had already made. It was then that she told me that she wanted me to do something different and that she wanted to add a few pictures on the card too.
After giving it a bit of a thought, I realised that a simple card wouldn't be able to accommodate messages as well as multiple pictures. So I suggested an Accordion Card.
I had never made one before, so this was a challenge for me as well. But I had seen one or two Accordion cards before and I kind of knew how it should turn out, so at least I knew how to start.
I decided to make a standard size card (4.25"x5.5") The accordion flaps on the inside measured 3"x4".
Once I had those ready, it was just a matter of printing the content and the pictures out and embellishing.
Printing is always difficult and the most time consuming thing when you're making a card for the first time as you have to create a template with the right size, the right margins and of course, test it on plain paper before you can print it directly on cardstock. This obviously saves time when you decide to make a similar card again, but as I said earlier, the first time is always hard. Although the Accordion flaps were 3"x4", I made the text and photo panels 2"x3" so that there would be space left to show the Patterned paper in the background, as well as add a few embellishments.
As soon as I was done making the templates and writing all the measurements down (in inches & centimeters) for future reference, I decided to print the message out.
After that, it was just cutting, scoring & embellishing! ;) Here's how the final card turned out...
 |
| This is how the card looks when it is opened. |
Here is the complete list of the many products & supplies used to create this card. Most are from Lulupu. The others are purchased from different stores but since my Inlinkz Account is free, I have linked them to Simon Says Stamp. :P
Products from Lulupu
Other Products (Linked to Simon Says Stamp Store)
Nikita


(2).JPG)


Stunner! only u can whip up such pretty stuff! love the colours nikki!
ReplyDeleteVery pretty card Nikita.I love the PP that you have used from SSS. Very pretty. You have embellished the card very well. The thing I like the most is,though it's the first time,you made it look perfect. :)
ReplyDelete