Hello everyone,
I am one day late in posting this, but believe me, the rains have not been helpful :( Anyway, I am here now and today, I have for you a Flip Flap Card with a video on how I made it. I've covered most of the steps on video, but for parts I haven't covered, I have drawn a template and there's a document with all the measurements and steps to create this.
This was made in 2014 for one of the students at the Coaching Classes where I taught. Here's what the card looks like.
I've used Patterned Papers from Fancy Pants Designs' As You Wish 6 x 6 Paper Pad. I loved the Brown, Yellow, Blue, and Orange combination.
The die cuts are from Simple Stories' Good Day Sunshine Collection.
I added some cute buttons, some fussy cut stars and lots of stickles glitter :)
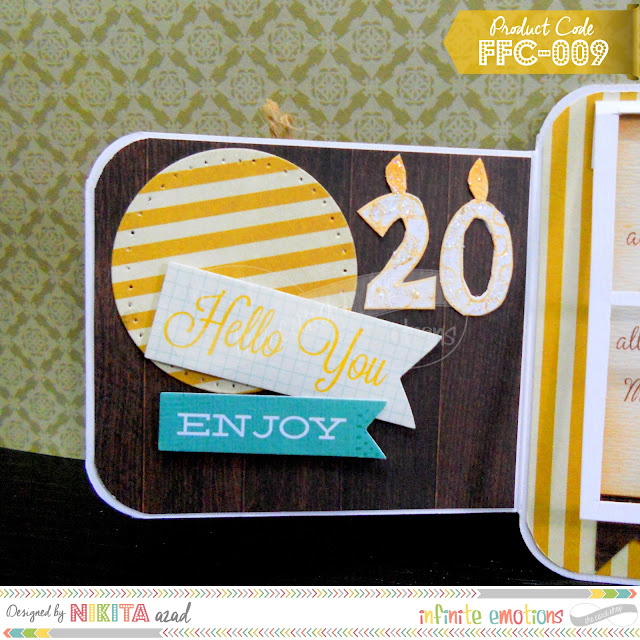
Inside, I made a small window that could be lifted to read the message underneath. Now that I think about it, I think I could have added acetate under the window frame and given it an actual window-like look. Maybe next time.
Here's a closer look at the inside flaps.
And here's the back of the card.
Now for the video! Watch how I made the card, below :)
Measurements and other details to make a similar card
As I said earlier, I've created a document with all the measurements and steps on how I made this card. I've also created a template for the card base and the window, and you can use that to recreate this card or create a similar one.
All of these documents are available at the Resource Library. If you're on my subscriber list, you'd have already received the access details. If not, enter your e-mail address below to receive those details immediately. :)
Please note that in case you replicate this design or make a similar one, I would appreciate it if you would link back to THIS POST. Here's the LINK. If you could also drop a link to YOUR post in the comments, I would love to see what you made :)
Supplies Used
Tools
1. Fiskars Sure cut Paper Trimmer 12x12
2. Martha Stewart Scor Board
3. Cuttle Bug Machine
4. Spellbinders Nestabilities Standard Circles Large Die Set
5. EK Success 1/2" Circle Punch
6. Blending Foam
7. Needle tool
8. We R Memory Keepers Corner Chomper
9. Acrylic Block
10. Sakura Koi Waterbrush
11. Fine Tip Scissors
12. Fine Tip Tweezers
13. Kangaro Single Hole Punch
2. Additional White CS for Sentiments & belly band - as per requirements
3. Tape Runner/Liquid Glue
4. Foam Adhesive
5. Glue Drops
6. Patterned Paper | Fancy Pants Designs - As you wish 6 x 6
7. Die Cuts | Simple Stories - Good Day Sunshine Bits & Pieces
8. Ink |Memento Dye Inks - Cantaloupe, Tuxedo Black
9. Ranger Distress Inks | Tumbled Glass, Tea Dye
10. Stamp Sets - The Stamps of Life | Numbers for Cake, All4Stars
11. Twine | My Mind's Eye Follow Your Heart Be Happy
12. Stickles Glitter Glue
13. Assorted Buttons (Destashed by Karuna)
That's all I have for now. I'll be back later this week with a video on setting up my Carpe Diem Planner for July :D
Till then,
Have a great week!
Love,
Nikita.
3. Cuttle Bug Machine
4. Spellbinders Nestabilities Standard Circles Large Die Set
5. EK Success 1/2" Circle Punch
6. Blending Foam
7. Needle tool
8. We R Memory Keepers Corner Chomper
9. Acrylic Block
10. Sakura Koi Waterbrush
11. Fine Tip Scissors
12. Fine Tip Tweezers
13. Kangaro Single Hole Punch
Products
1. Card Stock - 4"x 11" for the base2. Additional White CS for Sentiments & belly band - as per requirements
3. Tape Runner/Liquid Glue
4. Foam Adhesive
5. Glue Drops
6. Patterned Paper | Fancy Pants Designs - As you wish 6 x 6
7. Die Cuts | Simple Stories - Good Day Sunshine Bits & Pieces
8. Ink |Memento Dye Inks - Cantaloupe, Tuxedo Black
9. Ranger Distress Inks | Tumbled Glass, Tea Dye
10. Stamp Sets - The Stamps of Life | Numbers for Cake, All4Stars
11. Twine | My Mind's Eye Follow Your Heart Be Happy
12. Stickles Glitter Glue
13. Assorted Buttons (Destashed by Karuna)
That's all I have for now. I'll be back later this week with a video on setting up my Carpe Diem Planner for July :D
Till then,
Have a great week!
Love,
Nikita.


.JPG)


No comments:
Post a Comment
Leave me some love!