Showing posts with label PP: DCWV. Show all posts

Wednesday, 16 July 2014

Box Card | Paper Lettering, Butterflies and Heart Shaped Cake

PICTURE HEAVY POST

If you're reading this on your mobile device, click here to read it in your browser.
That's the only way you can see the pictures the way they were meant to be seen.
Also, click on the images to see larger pictures. :)

Hello everyone!

I am sharing another box card today and I am so, so proud of this one. It was requested by a guy for his fiancée's birthday and he wanted us to go all out and make the best one possible. He also wanted her name to appear somewhere on the outside of the box. So Moumita and I thought, this was the perfect opportunity to do some lettering with 3mm quilling strips! And here's what we came up with.

We picked two colours from the pictures - dark pink/red and green - and started with that as a base to pick patterned papers, and here's what we had.

The pink mixed media sheet is from DCWV's Mixed Media Mambi Collection.
The green printed sheet is from one of the 12x12 sheets that Karuna destashed. 
This one one in particular was Fancy Pants Designs, I think.
The solid CSs used for layering (both pink & green) are from DCWV's Scrapbook in a Stack 8x8 pad.

So let's see what we did here.

One side of the box said 'Happy.' 
We did that with red quilling strips and added a few butterflies on the side.

Monday, 14 July 2014

Scrapbook - Page #4: Big Fat Wedding

This post is the FOURTH POST in a series. To read all posts in this series, click here.

See previous pages here...
1 | 2 | 3

Hello everyone and welcome to a brand new week!

Last week was so much fun!!! There was a wedding in the family and I have no idea how the went past!!! What's more is that I had to ensure that the posts didn't stop, so it took some extreme dedication and discipline on my part to finish them in advance and for the first time SCHEDULE them!! :P :P

Anyway, speaking of weddings, this page is all about the couple's wedding. An Indian wedding attire (especially for the bride) is traditionally in reds, maroons and pinks and this one was no different. So I chose a nice pink PP from Crate Paper's Flea Market Collection with pink hearts and all that bokeh effect with the hearts in the background. With the perfect paper in hand, I picked out all the matching embellishments and was ready to go! Let's start with peeks, shall we?

This is the top right corner of the page and aside from the washi tape, I've used two die-cut pieces
from none other than Kaisercraft's Hopscotch collection.

Friday, 11 July 2014

Girly Box Card With Black Mats

So this one was requested by my sister Ananya and her friend Navneet for their friend Komal's birthday!!! They're all childhood friends and have grown up together. Ananya was claiming her 'first one is free for family' voucher :P when she asked me to make a box card, I asked her if she wanted a theme and she told me to do whatever I wanted. I asked her if she wanted a specific colour and she said black. So I took it ahead from there.

For this box, I picked only one sheet of 12"x 12" PP (as opposed to two or three different ones that I usually use. Some cut downs for pro-bono work ;) ) from DCWV's Mixed Media Mambi Collection and this one in particular was a pretty busy pattern and went really well with the black CS layered underneath. Moumita worked on this one as well. I just assembled everything on the inside, as in, just glued them on the CS.

Let's take a look at the box..

Saturday, 5 July 2014

Scrapbook - Page #2: Double Delight!

This post is the SECOND POST in a series of posts. To read all posts in this series, click here.


See first page here...

If you're reading this on your mobile device, click here to read this in your browser.
Click on the pictures for a better view and larger images.

All the pages in this scrapbook (so far, there are only five, including the cover. I am hoping I will get the opportunity to add more later) have a story to tell. 

Page #1 - Cover
Page #2 - When the couple's engagement was finalised/Roka done on her birthday (thus the page title)
Page #3 - Courtship
Page #4 - Wedding, and finally,
Page #5 - Honeymoon.

Now that I've explained the story behind the page title, let me reveal (again) that I was making this was around the time I had purchased a load of new craft supplies and Crate Paper's Flea Market collection was nothing like I'd seen before. To add to my delight and absolute craftasgmic pleasure, the die cuts from Kaisercraft's Hopscotch Collection co-ordinated so well with the papers that I am tempted to call this scrapbook the Flea Market Hopscotch Scrapbook. You know what, maybe I will! It's my creation, I get to call it whatever I want!!

And put those two together with some gorgeous washi tapes and wood veneers and we have ourselves a couple of fascinating pages! Here's one for sure.. Alright, I'll try and be humbler from this point forward.. :P

For this page, I used a teal coloured wood-grain background.
To the top of the page, I cut out a strip from on of the 12 x 12 sheets from DCWV's My Sunshine Paper Pad,
adhered it with only a little bit of glue and then and ran my Sew Easy tool over it.
So the upper section is actually stitched together by hand and will hold up even if the glue doesn't - not that it won't. :)
For the page title, I used two things...
a) American Crafts & Pebbles' Walnut Grove Thickers - DOUBLE
b) Studio Calico's Wood Veneer Alphabets - {DELIGHT}

Thursday, 3 July 2014

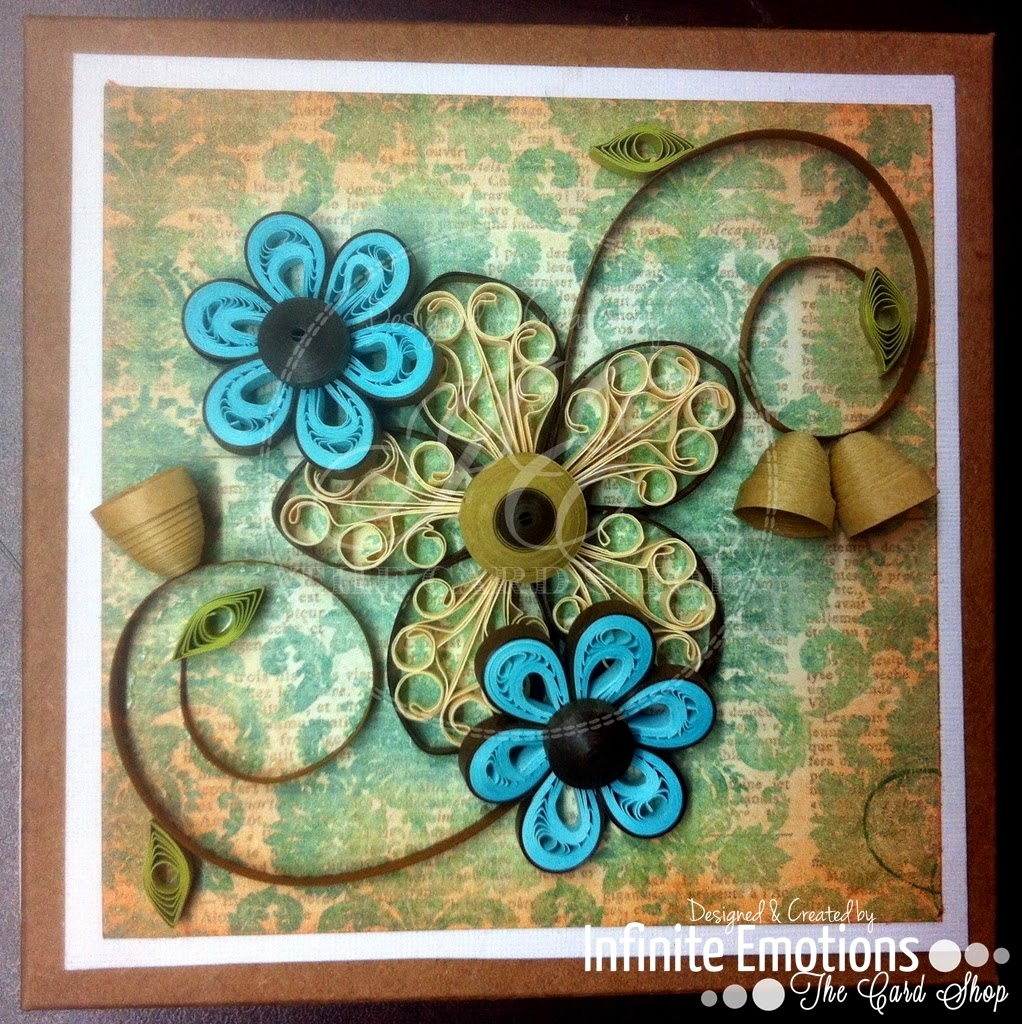
Box Card | Quilled Floral Paradise!

PICTURE HEAVY POST

If you are reading this on your mobile device, click here to read it in your browser.
Click on the pictures for a better view and larger images.

So this box card was requested by Moumita's cousin and he wanted us to go all out with the Quilling an we did. This was a double box card - a box within a box card - so that meant double the fun!! :D :D As it was for Moumita's cousin, I thought it would be good practice for her to make the box on her own. So I haven't done a thing in this, except selection of the PPs, the design and size of the flowers, the colours of the Quilling strips etc. In short, I designed, she created. I didn't lift a finger and I loved it!! :D :D

Let's talk about the outer box first. The papers used for this were from DCWV's Mixed Media Mambi Collection - Sides and Lid. We did green on two sides and orange on the other two. The design had one large Royal Flower and two smaller Malaysian flowers with a bit of leaves on the sides. This design was a slight modification of the design used on the lid of an older box card (image below.)
Complete post of the above box on the Lulupu Blog here.

The design was exactly the same for the green as well as orange side...
We tried something new here... We did a black outline on everything Quilled... 
Almost everything

Glimpses of the Green Side... :)

Monday, 30 June 2014

Scrapbook - Page #1: You & I (Cover Page)

This post is the FIRST POST in a series.

If you're reading this on your mobile device, click here to read it in your browser. Please click on the pictures for a better view and larger images.

I am so excited to be able to share this new scrapbook with you because with experience, this one has turned out to be waaay better than I expected. Also, I made this when I had just purchased some new craft supplies. Actually, some is an understatement; I had purchased a whole lot, and I used quite a bit of those in this scrapbook.

Here's a glimpse of all the yummy stuff I had bought!!
**drooling**

Wednesday, 25 June 2014

Scrapbook - Page #9: Always & Forever

This post is the NINTH (last) POST in a series of posts. To read all posts in this series, click here.

See previous pages here...
1 | 2 | 3 | 4 | 5 | 6 | 7 | 8 

Finally, finally!! This is the last post in this series!! I am so excited because I can now start sharing pictures from the next scrapbook :) Okay, but before that, let's talk about this one. The last and final page... Sigh!! I can't believe we're here already... :)

This page is pink too, because of the pictures.. 
and like most of the pages, I did the title of the page using Memory Box's Lower Case Alphabet dies
on white CS so that the white stands out.

For the sub-title, I used alphabet stickers from Echo Park's This & That Graceful Collection.

Friday, 20 June 2014

Scrapbook - Page #8: Love Completes Life!

This post is the EIGHTH POST in a series. To read all posts in this series, click here.

See previous pages here...
1 | 2 | 3 | 4 | 5 | 6 | 7 

I am back with the second last page of the scrapbook!! :)


Like most of the pages for this scrapbook, I have used a 12"x12" sheet from DCWV's Mixed Media Mambi Collection for the base. The top of this sheet had some pattern that was irresistible.. as in I could not stop myself from stitching along the lines. So I ran my Sew Easy tool over it and just did a simple stitch all along the entire top section of the page.

Monday, 16 June 2014

Scrapbook - Page #7: Garden of Love!

This post is the SEVENTH post in a series. To read all posts in this series, click here

See previous pages here...
1 | 2 | 3 | 4 | 5 | 6

Third last page, two more to go!! Woo hoo!! I think we'll be done with this scrap book this week and I can start sharing the next one... :D :D

I picked a pink colour Mixed Media Mambi page for this layout because it matched with the pictures and even though the page was already busy I couldn't not embellish. I used one of my favourite fussy-cut embellishments - butterflies from a 6" x 6" sheet from Jillibean Soup's Blosson Paper Pad and Flowers from one of the 12" x 12" sheets from Echo Park's Sweet Girl collection. Take a look.. :)

Wednesday, 11 June 2014

Scrapbook - Page #6: A Gorgeous Background and Minimal Embellishments!

This post is the SIXTH post in a series. To read all posts in this series, click here.

See previous pages here...
1 | 2 | 3 | 4 | 5

The page I am sharing today was one of the easiest and one of the hardest. Easy because the page, by itself, already has so much going on that it didn't require any embellishment and looked so gorgeous! Hard because picking embellishments that wouldn't make it too much, was tough. So I decided to start simple.

I picked neutrals and light greenish-blue shades of scrap PP (based on the colours on the page) and cut out circles using a circle punch and some banners. I alternated between the banners and half-circle and made a clothesline sort of embellishment and stuck a Studio Calico Wood Veneer Bird on it. I did this in a couple of places.

Monday, 9 June 2014

Valentine's Day 2014 | Project - The Last One(s) - Box Cards with Paper Lettering

Alright people,

I am finally sharing the last of my Valentine;'s Day 2014 Collection. After the tweaked card, the accordion card and easel card, I made three identical box cards. As I was leaving for Goa that very evening (as in I packed in the last 30 minutes that I had after my friends from college who requested these, picked them up from my house) I had no time to click pictures and I had to request them to give the cards/boxes back for a day just so that I could click pictures. But these boys took the longest to get the box to me... three and a half months!! And even then, I got only one of three back. Their excuse - they all look the same. Bah!

But I have the pictures now, so that's the silver lining. :D Anyway, this was made when we were still excited about lettering after we made this card and as my friends wanted it in their boxes too, we got to work. 

As the boxes were made for Valentine's Day, we stuck with the red and added some beige for contrast. We used red polka dotted paper from DCWV's My Sunshine Paper Pad on two sides and a beige PP from Echo Park's Paradise Beach 12x12 Collection on the other two. We did the lettering on the beige PP - 'Happy Valentine's Day' (I did this part) on one side and 'I Love You' (Moumita did this) on the other. Here are a few glimpses when we were still making the boxes.

Friday, 6 June 2014

Scrapbook - Page #5: Holiday Fun!

This post is the FIFTH post in a series. To read all posts in this series, click here.

See previous pages here...
1 | 2 | 3 | 4

Yay, another page from the scrapbook!! I am so excited that I am posting frequently now and clearing the backlog... I am so so glad about that!

Anyway, back to the page I am sharing today; this one has pictures from their vacation(s) so we had a nice holiday theme going on and I used a lot of stickers from Echo Park's Paradise Beach collection. For the background, I used a 12x12 sheet from DCWV's My Sunshine collection. It was beige and ruled and there was so much I could do with it.

So on the top, I added border stickers and below that, I added the page title, cut out from alphabet dies on various left over PP cut-outs. I added some more stickers round that... 
a cocktail glasss, a pair of sunglasses and some flip-flops.

Tuesday, 3 June 2014

Scrapbook - Page #4: Tulips, Hearts and a lot of Love!

This post is the FOURTH post in a series. To read all posts in this series, click here.

See previous pages here...
1 | 2 | 3

The next page from the scrapbook is one of my favourites for numerous reasons. This page has pictures from the couple's wedding and reception. The colours in the pictures were so amazing that this blue-green mixed media paper was the best thing that would go along with it. Also, I tried something new with this, so all of those things make this page really special.

Let's start with the glimpses. :)

The page had a lot of white polka dots, so I stamped large hearts in Barn Door Distress Ink  and stitched through the center. It was a slight word play on the page title "Hearts Knit Together."
I couldn't knit, so I stitched. :)
I also stamped little hearts in Memento's Lady Bug. :)

Monday, 26 May 2014

Scrapbook - Page #3: Bright on Black!

This post is the THIRD POST in a series. To read all posts in this series, click here.

See previous pages here...
1 | 2


This may seem odd but it has kind of become the norm for me. I post ALL my projects late and this one, in particular, has been neglected for far too long. I finished and couriered this scrapbook way back in October first week, last year. I shared two of the pages (out of nine) and then newer projects grabbed my attention.

But a week or so ago, I decided I had to take a stand and I vowed to myself that till I am done editing and watermark-ing ALL my older projects, I wouldn't share a single thing. Now that it's all finally done, I can breathe, so to speak. :)

I may have mentioned this before, but I'll say it again. For this scrapbook, all pages barring one, are from DCWV's Mixed Media Mambi Collection.

I used a black page for this and added some bright and colourful elements for contrast and loved the effect.

I stamped flowers and leaves in Distress Inks - Wild Honey, Mustard Seed, Barn Door and Peeled Paint - and Fussy Cut them. For the flowers, I have layered three of them to add dimension and added a little pearl in the centre and some stickles on the sides.

Saturday, 22 February 2014

Happy Birthday, Boss! | Quilled Birthday Card

Good morning folks!

Today I am sharing a card that I made way back in September last year and then totally forgot about. It is a birthday card made for someone's boss. It is colourful, fun and quilled. So as usual, I will start with showing you peeks from various sections of the card and then I will reveal the whole thing. If you've been a regular here, you would know how this works :)

So here's the first peek. The card needed to have a few two pockets on the card front so that small messages written on tags could be inserted into them. So we made two pouches one below the other and embellished them with party favours like gift boxes and party hats (we’ve stamped, coloured and fussy-cut them before adhering them on the pouches.)

Friday, 20 December 2013

Scrapbook - Page #2: I love yellow! | Lulupu Challenge #22 & Blog Hop

This post is the SECOND POST in a series. To read all posts in this series, click here.


See first page here...
1

You must have landed here from the Lulupu Blog and I am so excited to be a part of my first Blog-Hop!!! So welcome, and for those who have landed up here, directly, let me give you a little background on what's going on. 

We're having a Recipe Challenge and a Blog-Hop at the Lulupu Blog this month. Here's how you can join the fun! :D

1. Follow the Lulupu Blog.
2. Like our Facebook Page.
3. Add the Blog-Hop Badge on the left/right sidebar on your blog and link it to the challenge post.

4. Blog about joining the Hop on your blog either in a separate post or in your participating post.
5. Make sure you leave a comment on each designer's blog and we ask that you leave a comment on the challenge post as well to be in the running for the prize. The last stop on the hop will be back at the Lulupu Blog so please leave your last comment there, lettings us know your thoughts on the fabulous projects presented by our talented designers.

Saturday, 30 November 2013

Scrapbook - Page #1: Cover Page

This post is the FIRST POST in a series. To read all posts in this series, click here.


Hi Everyone!!!

The title says 'Scrapbook - Page #1.' I can see how that can be confusing considering I already shared the cover page of 5th Anniversary Scrapbook. But this is another scrapbook that I am sharing - one I finished in October first week. You see, I was waiting to finish sharing all 15 pages of the earlier scrapbook, but given the rate at which I am sharing, it may be mid-2014 by the time I am done. So to kind of speed up the process and have a little variety here on the blog and the Facebook Page, I decided to share one from each, alternating between the two. :)

In the spirit of full disclosure, I already shared this for Lulupu's Fancy Me Challenge Inspiration (Original Post here) and I am just pasting the entire content, obviously editing it as I deem necessary. So some of you may have seen this already. I chose this page as an inspiration for the challenge because, quite frankly, it fit the theme perfectly as I had used many of the techniques I fancy and use in both - card-making as well as scrapbooking. Also, now that I am slightly more comfortable with scrapbook pages than I was about four months ago, I can make something and call it my style. What's more, I have managed to capture the whole thing on video, so you can watch me make this :)

Let the sneak peeks begin! :)

First of all, this page has my most favourite of all things... STITCHING!!! :D :D
I stitched using my Sew Easy Tool and this stitch piercer. I had just bought it a few days before I made this and wanted to try it out!!! I loved how the colours on the thread match perfectly with the Base PP, which by the way, is from the DCWV Mambi Mixed Media 12x12 Collection (Such gorgeous papers!!!) Also, at this point, I'll let you in on a secret - ALL the Base PPs used in this scrapbook are from the Mambi Collection!!! Super gorgeous!!! 

Thursday, 5 September 2013

Birthday Mini Album

It's been a month; a whole month since I made this and I didn't share it yet. I feel horrible because I know someone is waiting for me to upload pictures so that they can show their friends, and now I am finally, finally going to do that. I will talk write only as much as the post needs and I'll let the pictures speak for themselves (in less than a thousand words; much less, hopefully :P)

As usual, the complete, exhaustive product list is at the end of the post, but we'll get to that.

So this Mini-Album was a gift from a group of friends, for another one's birthday!! So here's an album filled with their favourites.. :)


The album cover with ribbons, buttons, balloons, twine, stamping all over the place and the birthday boy's pictures!!

Wednesday, 28 August 2013

Scrapbook - Page #3: Pinwheels, Speech Bubbles & Washi Tapes!

This post is the THIRD post in a series. To read all posts in this series, click here.

See previous pages here...
1 | 2

I was planning on posting yesterday, but turns out it was my turn to post on the Lulupu Blog and as much as I love blogging, I can only handle one post in a day. :P So anyway, today I am here to share the third page of the 5th Anniversary Scrapbook that I made in the beginning of this month.

For the base sheet, I used yet another pre-printed page from the My Sunshine 12x12 Paper Stack from DCWV; it made my life very easy :P There were two pictures that needed to be used on this layout and I adhered them with Tombo, and added Washi Tapes on the sides as accents. I also stamped geometric shapes (like in did in the previous page) and stamped them in Richo Cocoa and Tangelo.

Friday, 23 August 2013

Explosion of Coffee, Photography, Golf & Poker!!!!

So, I had said yesterday that I will be sharing the detailed Exploding Box Card that I made, and I am ready to do that now. I made this card for my school friend, Kamya who wanted it for her fiance. Kamya is currently in Arizona, USA, doing her PhD. During one of our Skype/Google Hangout sessions sometime in April this year, she realised that she had never got anything made from me, which, considering the fact that she is one of my oldest friends, was surprising. So she ordered not just one, but THREE things from me. The first one was for her Dad's Birthday in May, the next for Mother's Day and one for her fiance's birthday in August!!!

Now sending the cards to her parents was very easy because they live pretty close by. But her fiance is in Arizona as well. When I asked her how she was planning for the card to reach halfway across the globe, she said she was planning a trip to India in mid-May and she would take it back with her when she left mid-June. So, I made this two months ago, but couldn't share it until now. :D :D

She wanted a Double Box - a box, inside a box - so I suggested that we add some themes, instead of just using random embellishments. So she gave me four of Shekhar's favourite things/pastimes - Coffee, Photography, Golf and Poker. She also had four photos to add which actually made things perfect. We used two themes and two photos on each of the boxes. :)

Time for some pictures now!!! :D :D