
PICTURE HEAVY post. Click on the pictures to get a better, closer look. :)
{If you're reading this in your e-mail, click here to read this on your browser and then click on the pictures to get a better closer look :P}
So after my first accordion card turned out to be so great, when I got the opportunity to try again, I did not hesitate. Not even a bit. I made this for a college friend who wanted something nice, pretty and colourful for his wife's birthday - something that he could add a lot of pictures to. I could have suggested a Box Card, but I thought I'd let myself have a chance to play with an Accordion card, so I suggested this. Moreover, he had seen the Quilled Box Card I made for his sister and he wanted me to do something different too. It's amazing how the universe conspires to get everything in place! :P
I have used a loooot of products - papers from different pads, at least 3 stamp sets, done a lot of fussy cutting, heat embossing and so many other things!! :D :D I can't wait to share. I will begin with sneak peeks, as usual.
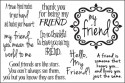
I used Lawn Fawn's Bannerific to stamp these banners on PPs of different colours and patterns to get a milti-coloured banner. :) I have stamped the banner in Rich Cocoa - my 'go-to' colour after Tuxedo Black.

Below the banners, I decided to create a Chalkboard. I took a piece of black CS and heat embossed the frame and the sentiment in Ranger's Seafoam White Embossing Powder, and LOVED the effect!
The Roses are fussy cut from a 6x6 PP from Crate Paper's Little Bo Peep Pad.
I also stitched along all four sides of the chalkboard.

Below the chalkboard, I made loops with the same thread I used for stitching.
I wanted it to look like scallops and I think I got pretty close. :)

Here's how the complete chalkboard looks like.
I glued a brown ribbon underneath the chalkboard so that I could tie the accordion together
(something that I didn't do for the first one.)
I left the other end un-glued so that I could wrap it around the card when it was closed
and let it go when the accordion was open.

Neat little bow, eh? :P
My friend said he was afraid to open the card because he wouldn't be able to tie the bow back the same way! ;)

Here's how the complete front of the card looks like.
I used a grey PP (My Mind's Eye - Miss Caroline Dolled Up 6x6 Pad)
because the lighter, neutral background would make..
a) The chalkboard pop.
b) The banners and colourful flowers pop.

%20For%20more%20pictures%20and%20a%20complete%20list%20of%20products%2C%20visit%20the%20blog%20---%26gt%3B%20http%3A%2F%2Fbit.ly%2F18dThmu)
And now for the insides...
This particular Accordion had 6 flaps, so I used 4 for photos and 2 for messages.
I continued with the colourful banners that I used outside...


And the same roses that I used outside. I just added a bit of stickles glitter on these roses.

Here's how the first two photos looked

For the message on the extreme left flap, I created another smaller chalkboard, with stitching, that said - a little message for you. This sentiment is from Lawn Fawn's 'Just My Type' set.

I layered this chalkboard over a triangular pouch that I made.
The pouch held a tag with a message.
I embossed a plain beige PP using Provocraft's Honeycomb embossing Folder.

I distressed this tag using four colours - Mustard Seed, Crushed Olive, Tumbled Glass and Spun Sugar
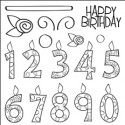
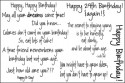
and Stamped a simple "Happy Birthday" on it.

I've designed the other three flaps in the same way. So I will just show you pictures. :)


I left this tag blank so that my friend could write a small message by hand. :)

And now.. for the entire inside of the card!! :D :D

%20For%20more%20pictures%20and%20a%20complete%20list%20of%20products%2C%20visit%20the%20blog%20---%26gt%3B%20http%3A%2F%2Fbit.ly%2F18dThmu)
I am not going to lie. I may sound pompous, but I loved how this turned out and I am pretty proud of myself!! :D
I am entering this card to Pretty Paper Studio's current Challenge - Anything goes.. :)
From Lulupu
Others


Next time, another page from the scrapbook!!! Until then, have a nice weekend!
Love,
Nikita...
Oh wauw, the accordion-part is great! Nice way to put more photos on a card. Lovely paper and details. Love the pretty banners too!
ReplyDeleteThank you Miranda!! The best thing about this type of card is, if you have more content, you just need to add more folds on the inside.. :) I am glad you liked this! :)
DeleteYou got a right to be pompous...this look gorgeous!!! LOVE IT! simbly awesome!
ReplyDeleteThanks Tejal!!! Coming from you, I know this one must be really good! ;)
DeleteThis is very pretty Nikita! Love those cute banners and the best thing about your card is it's soooo neat, LOVE it! :)
ReplyDeleteThank you soo much Sindhu! :)
Delete